Showing posts with label Punches. Show all posts

A Handful of Cards to Begin with!

I thought I'd start off with a few easy cards, just to get back into the swing of things.

A tiny 3"x3" Card, using some co-ordinating coloured flowers from my stash :)
A 3"x3" Notelet. Very cute, and I must make more when I get time!!

I thought I'd make another flower card, but with a little difference. You can't see the dry embossing I've done on this photo, and the card is a long way off being finished, but I thought I'd post anyway :)
Using some ribbon scraps, punches and a little ink and buttons, here is a quick card which I loved making! So cute too.
One of my favourites for the evening I think. Candles and flames are 3D, as is the sentiment. DPs from SU! Sweet Pea and PM The Big One.
4"x4" Kraft card, 3/4" punched DP - Lime Rickey. Have left this un-embellished and with no sentiment, so it can be used as an all-occassion card
To finish off the evening I quickly put this one together. Lavender Grosgrain ribbon, SU! Buterfly punch, Woodware button, DP Amethyst Infusions. Thank you sentiment in SU! Basic Grey from Perfectly Clear Garden Box set.

Tri-Fold Card

I got this idea from many different blogs and videos I have seen on the internet, so I cannot take credit for the base card design. Everything else on the card is my idea.

I used layering and piercing techniques, patterned papers and ribbon, buttons and flower embellishments. I am thrilled with this card, and so was my friend!

Sarah B BDay Card Feb 2010

In the very centre of the card, I designed a small pocket and a tiny card to go inside, to write our birthday message to her!

Sarah B BDay Card3 Feb 2010 Sarah B BDay Boho Flower Feb 2010

   Sarah B BDay Scallop Circle Flower Fen 2010

The small flower was made layering two flowers from the Stampin’ Up! Boho Blossoms punch and adding a button to the centre.

The large flower I created from the Scallop Circle punch, by Stampin’ Up! I cut every other petal to the button, and folded each heart-shaped petal in half to make it 3D.

Ring Bound Notebook

I thought of a cute little notebook I could make for a friends’ birthday. I wanted to make something practical and pretty for her. Bearing in mind I’m just starting to get into cardmaking, scrapbooking and other crafts, I thought my idea came out ok!

Ringbound Mini Notepad

I gathered together several coloured notepapers and cut them all down to size. It took a while to get them all to match up properly!!
From black cardstock I made a wallet-style cover.
Using my new Crop-a-Dile, I punched holes in the black cover for the ribbon to pass through, and holes through the corner and all pages for the binding ring. I added eyelets on the front and back of the cover (to make it last longer!!).
I tied ribbon through the closure holes and tied four different ribbons to the binding ring.
For the flower I used Stampin’ Up!’s Scallop Circle punch, cutting and folding, to make a layered flower.
Then I added a button to the flower, and my friend’s initials on the front in a gold gel pen.

Ringbound Mini Notepad Detail

Punches Galore!

I had been looking around the internet for cute little animals I could make with them. I cannot take credit for original ideas here, and I don’t know where I got the idea for each from…

While Garry was at the gym with the guys tonight, I got to work on these. How cute are they!?!?!!

Punches - Bear
Bear is sooo cute! He is the first I had attempted!

Punches - Bunny 3D
This bunny’s face is partly 3D. To add a little more colour, I gently chalked the little cheeks and dotted them too! Though I forgot to add her whiskers. Oops!

Punches - Lion
I didn’t have any inks at this point, and think if he had have been inked, he would have looked better. But I LOVE him!! He’s adorable!!

Punches - Bunny
Oh no! She’s missing her nose!!! I sadly couldn’t find it when I was doing the photography, so you will just have to imagine a sweet little pink nose (about the same size as her eyes!)

Punches - Reindeer
I (STILL) haven’t managed to finish of Rudolph here – He is missing his antlers!!

Punches - Hippo
And the last punch project I did that evening.. A super cute Hippo!! I got this card from The Paper Shop, and it adds a wonderful sparkly sheen to it :)

Playing around with my new Stampin’ Up! supplies

After receiving my punches, stamps and Tombow adhesive yesterday, I decided to have a quick play around with some quick ideas I had..

An All Occasion mini card.
I had a play with some of my new Stampin’ Up! circle punches, but it’s just not right!
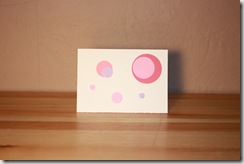
Random All Occasion Card 02
A 3”x3” Birthday mini card.
This was stamped with Stampin’ Up!’s Whimsical Words set. The blue, red and green edge was created using tearing rulers with paper, with each slight overlapping.
Random Birthday Card 03
A 4”x4” Baby Girl card!
I REALLY like this card. I would like to make it again, but with different images and other bits, and maybe add some inking? Perhaps other distressing techniques, flowers and buttons too?!
I used some patterned paper from a 6”x6” Forever Friends pad for the flowered upper background paper.
I layered the main picture, which came from a baby paper stack (I think by Dovecraft?!) onto some medium pin cardstock. Using the Stampin’ Up!
Whimsical Words set, I stamped the “small wonder” stamp onto white cardstock, then mounted it on a Stampin’ Up! Oval Scallop punch in pale pink cardstock. Mounting it onto the card with 3D small pads.
Random Baby Card 02
A mini All Occasions card.
I had an idea of how I wanted this card to look. And this is exactly what I wanted!
I used a piece of white cardstock, cut at 4”x4”. I punched the bottom border with the Stampin’ Up! Eyelet Border punch. I then cut a piece of purple cardstock 4”x1-1/2” and stuck it to the back of the eyelet border, allowing the purple to show through the punched out dots, and lining it up so when the card is shut, the purple card is in line with the back side of the card.
Using my new Perfectly Clear’s Garden Box Set clear stamps, I stamped the front image in purple. I then stamped two smaller images inside.
Finally I tied a ribbon right around the front of the card!
Random All Occasion Card 03 Random All Occasion Card 03 Inside