Showing posts with label Mini Albums. Show all posts

Baby Album - Long overdue!!

I began making this album many many months ago. I never photographed it :(. But I have now!

I don't like it, there are many things I'd do differently if I were to remake it.

Front

Inside 1 - Pull out tag on the right
Inside 2 - Pull out tag on the right of the right page

Inside 3 - 4 pull out tags, all different colours and embellishments

Inside 4 - Pull out tag in the purple and lace pocket
Inside 5

Inside 6 - Pull out tag in the butterfly pocket. Photo an be slipped partially under the "a new baby" cloud for effect.
The back has been left plain, as I didn't want to embellish or decorate, as it'll get damaged that side.


As I said, this was one of my very first projects I made, and I'm not overly happy with how it turned out. I'm not keen on the hiddledy-piggledy thing going on, but it's cute, and I will send this out to a friend very shortly!

Star Album

Wow! Last night I finally got round to making a Star Album. I had a couple of mishaps on the way - but you need to make mistakes to learn and develop!! I'm very pleased with the final piece.

The outside measures 6" x 4". The inside pages measure a square 4" x 4".

Front, closed view

Inside, fully opened. I used Black and Lilac CS and two purple DPs from a co-ordinating pack to decorate the inside pages of this album.

A bird's eye view. Pretty, isn't it! And very easy to make!!
 
Instructions

Note: Cutting the CS and DP is the longest part of this project!

Materials
  • 4" x 6" Chipboard x2
  • 4 1/2" x 6 1/2" DP x2
  • 20" to 24" Ribbon
  • 4" x 12" CS x7
  • 4" x 10" CS x7
  • 4" x 8" CS x7
  • 3 1/2" x 3 1/2" DP x7
  • 3 1/2" x 3 1/2" CS x7
Method
  1. Glue one of the chipboards well. Adhere to back of the DP, ensuring it is centralised! Repeat for other Chipboard piece.
  2. Cut corners, fold and flatten DP over edges, then adhere down.
  3. Take a piece of the 4" x 12" CS. Apply adhesive to the inside of one end. Align one of the 4" x 10" CS overtop and press down. Apply adhesive to the end of the 4" x 10" CS, then get adhere down a 4" x 8" piece on top, ensuring it is exactly aligned.
  4. At the other end of the 4" x 12" CS, apply adhesive. Pull over the middle 4" x 10" piece, align and press down. Apply adhesive to the end of the 4" x 10" piece, and pull over the 4" x 8" piece, align exactly and press down. To check you have done this right, the pieces should easily fold shut together. This is one of the star points.
  5. Repeat steps 3 and 4 six more times, until you have seven seperate star points.
  6. Apply a generous amount of adhesive to one side of a closed star point. Align a second closed star point over top, and press down when centralised. Do this for the rest, so they are all stuck together.
  7. Using the 3 1/2" x 3 1/2" pieces of DP and CS, apply adhesive and place through the inside of the album to decorate, as desired.
  8. Apply a line of adhesive on the top and botton of the star points pile, and adhere the ribbon on one side, pull it round (not too tight, but not too slack) the closed side and adhere to the remaining side.
  9. Using lots of adhesive on the chipboard covers, adhere front to the front of the star points pile, then do the same for the back.
  10. Open your album and stand it up open to marvel at your new creation :).
Post a comment and give the address as to where we can find a picture - I enjoy seeing others' creations!

Mini Double Accordion Album #2

Lastnight I made another Mini Double Accordion Album. I love this one just as much as the first one. The covers on this are thinner than the first. Note to self: Always use chipboard in the future!

The front, closed with Baby Pink Satin ribbon.

The fully opened inside. Every page has some form of decoration.

I added a couple of tags in this album for more journaling!

Standing partly open to show all the colours together.

CS used: Textured Medium/Heavyweight. Pink, Blue, Green, Brown
DP used: Penny Lane

My instructions on how to make this project - Click here


I am now off to make a Star Album!! I shall post that one tomorrow :)

Sarah x

A Mini Accordion Album using one sheet of 12"x12" CS

I'd also seen this album made a few months ago and thought I'd give it a go. I will add instructions, and this first one I have done I will re-do, and slightly differently too. The instructions will reflect the much-needed changes!

 
Front, closed view. DP Colossal Love Stack. Closed with Real red Organza ribbon.
 
Real Red CS one sheet of 12"x12" for the inside pages.
 
I wasn't going to add this picture, but thought it looked pretty :)

 
Instructions

Materials
  • 12" x 12" CS or DP
  • 3 1/2" x 3 1/2" Chipboard x2
  • 4" x 4" DP x2
  • 12" Ribbon (approx.)

Method
  1. Score the 12" x 12" CS horizontally, and vertically, at 3", 6" and 9".
  2. Fold the CS vertically in half (at 6"). Fold the CS vertically at 3" and 9", but the opposite way to the fold at 6". Use a bone folder when folding!
  3. Repeat step 2 for the horizontal score line, making sure the 6" fold is one way, and the 3" and 9" fold are the opposite way to the 6" fold.
  4. Cut the card along the black lines in the diagram below. Creating an M (or W) shape!
  5. Fold the card up, beginning at the "start" (on the diagram), alternating the folds as you go i.e. valley, mountain, valley, mountain etc. With each folding up behind the first. End at the "finish" (on the diagram).
  6. Cover the chipboard covers with the DP.
  7. Adhere the ribbon to the top and bottom of the inside "pages", then adhere the covers, centralising before adhering!
  8. Embellish and decorate throughout - the front/back covers too!

Mini Double Accordion Album

I had seen this made a long while ago, and decided to have a try. I may give it away as a present to someone, but I'd like to make another first!

Front, closed view. Double stitched Brown Grosgrain ribbon used as a closure. Chipboard covers, covered with DP and CS.

The inside. Both sides of the pull out sections are decorated with the DP!

A fully opened out view of the inside. Pages are 4"x4" and left un-embellished. DSP SU! Sweet Pea. CS Pink Sorbet & Dark Brown by PMD.

Another view :)

Instructions

Materials
  • 4" x 4" Chipboard x2
  • 4" x 9" CS
  • 4" x 9" DP
  • 3 1/2" x 8 1/2" DP
  • 3 1/2" x 12" CS x2
  • 2" x 3 1/2" DP x6
  • 2" x 3 1/2" CS x6
  • 14" to 16" Ribbon
Method
  1. Glue one 4" x 4" chipboard, adhere to one end of 4" x 9" DP. Repeat for other chipboard.
  2. Put a line of adhesive half way down, from one end to the other. Adhere ribbon to it, leaving an equal length either side for a bow or knot.
  3. Glue the partly covered chipboards and adhere the 4" x 9" CS.
  4. Score both 3 1/2" x 12" pieces of CS at 3 1/2", 7" and 10 1/2".
  5. Use a strong adhesive, and adhere the 1 1/2" segments onto the CS side of the cover, using the 4" x 4" chipboard underneath as a guide, leaving a gap on the top, bottom and outer egde of about 1/4". They need to open out, not in!
  6. Adhere the 3 1/2" x 8 1/2" DP to the inside, so as to cover up the 1 1/2" tabs you have just stuck on.
  7. Adhere the 2" x 3 1/2" DP and CS pieces throughout the album, as desired.
  8. Decorate, journal, add photographs and embellish to suit your needs.
Don't forget to post a comment below so I can see what you have made!

My first Mini Envelope Album

I have seen so many different styles of mini albums across the internet. I love most of what I have seen. I’ve taken several different ideas and put it into this album.

It is not yet complete!!

Bound (again) with binding rings (I’ve recently seen them referred to as book rings too!). And a little ribbon tied on each! I used my Crop-a-Dile, but had to do half at a time!

The envelopes are DL envelopes, and I used 4 of them. At the ends, when folded, I cut off the tiniest slither, to allow pockets to be created.

The front cover is thin chipboard, about an 1/8” bigger all the way round, than the size of the inside folded envelopes. I covered the front and backs of the chipboard with coordinating patterned paper – but I had a thought while doing it, if you run out of chipboard, or want to make a recycled album, you can use things like a cardboard box cut down, or perhaps cereal packet card?!

Mini Album 4x4 Brown

Just a couple of examples of the inside of the album. Every page inside is covered in patterned paper. Nothing else has been added yet!

Mini Album 4x4 Brown Inside Mini Album 4x4 Brown Inside2

Mini Album 4x4 Brown Pocket

This picture demonstrates how the pockets will look when filled, though this is not an insert for this mini album – I haven’t actually made them yet (shhhh!)

Mini Tag Album

As with Louise’s card in my previous post,I have been planning this for a while now. I specifically went out to buy the new “Honey and Hugs” Collection from PaperMania for this project. I love the collection! The animals are so sweet!!

This album is a 12”x12” black cardstock folded and then decorated. I handmade three tags to fit inside the pockets.

Embellishments used – Mulberry flowers, mini ribbon bows, mini heart and star buttons, buttons, eyelets, ribbon and animal cut-outs from the patterned paper.

Tall Tag Tri Fold Mini Album Lou Bday Inside Full Feb 2010


This demonstrates how the album looks with two of the tags out. Each tag has been decorated, embellished and has a colour coordinating eyelet and purple ribbon at the top. The tag on the mat has a tri-fold journaling card, which itself has been decorated inside.

Tall Tag Tri Fold Mini Album Lou Bday Inside & Tags Tall Tag Tri Fold Mini Album Lou Bday Front

The album folds up and is bound by the yellow ribbon, which runs through the inside of the entire album.

I will be making this again in the future, and have certain things I’d change to improve it!

6”x6” Mini Album Card

For my sister I wanted to make a special card, as it is her 22nd birthday in a couple of days. Truth be told I have been planning her card, and present for a good couple of weeks now.

The patterned papers used are PaperMania’s Amethyst Infusion. The Happy Birthday sentiment was stamped using the Perfectly Clear: Garden Box Set layered on purple and white cardstock, mounted on 3D pads.

Louise BDay Card Front Feb 2010


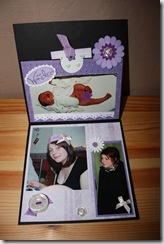
The top part here is the back, of the front of the card. I made a large pocket, but made a very small tag. In hindsight I would have made this tag bigger!
The tag has the edges inked in purple on the front, and inking on the back all over. I added a purple flower eyelet and tied through it some purple coordinating ribbon. I stuck on some pastel mini heart buttons and a tiny ribbon bow. It contains my sisters birth information i.e. Full Name, Date of Birth, Weight etc.
I added a photo of Louise shortly after her birth, covering her “bits” with a flower punch (SU!’s Boho Blossoms). I added an inked eyelet border. To embellish further, I made a 3D layered flower with a button and a 3D “small wonder” sentiment.

The bottom part I trimmed down two photos of my sister now. I then embellished with buttons and ribbon. I cut out a daisy from the patterned paper I’ve been using to add a little extra to the photo.
Louise BDay Card Inside 1&2 Feb 2010 


The “Family” page is the other side of the “now photos” of Louise.
I firstly layered a piece of patterned paper, then using Circle punches, a Scallop Circle punch, I put photos of my little family and mounted them onto white cardstock in Scallop Circles and squares with the corners rounded.
Overtop is a white tissue paper square, stuck down with the purple eyelet border. I stamped on the “Family” stamp.

The happy birthday page has a sentiment and flower stamped onto white cardstock, mounted onto the base black card.
Leaving a margin to the lhs, I glued on some flower sequins from my Daughters’ art and craft room!

Louise BDay Card Inside 3&4 Feb 2010 Louise BDay Card Inside 3 Feb 2010